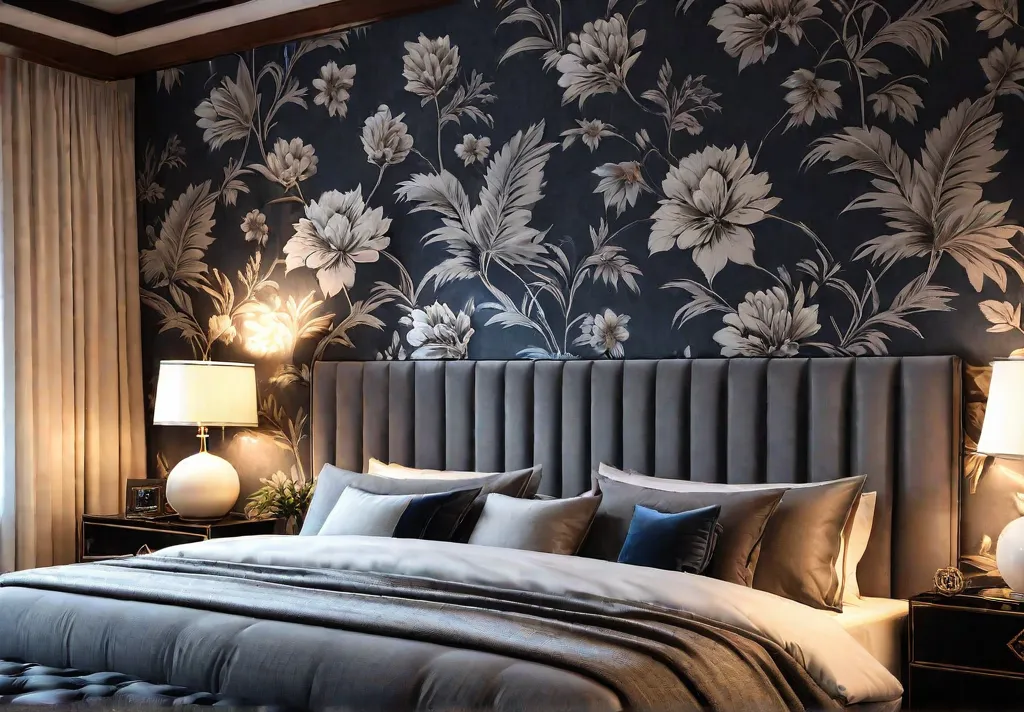
Are you tired of staring at your bedroom’s bland, lifeless walls? Get ready to transform your personal sanctuary into a stylish oasis with wallpaper! As a marketing manager at a tech startup and a self-proclaimed design enthusiast, I know firsthand the power of wallpaper to instantly elevate any space.
Did you know that a whopping 32% of homeowners prefer wallpaper as their wall covering of choice in the bedroom? That’s because wallpaper adds depth, texture, and a touch of personality that paint can’t match. And trust me, it’s not as intimidating as it may seem.
You can hang wallpaper in your bedroom like a pro with the right preparation, technique, and patience. In this comprehensive guide, I’ll walk you through the entire process, from assessing your walls to achieving that flawless, professional finish. So, let’s dive in and get your bedroom looking like it belongs in the pages of a design magazine!
Preparing the Walls
Before you roll out that gorgeous new wallpaper, it’s crucial to ensure your walls are in tip-top shape. Proper wall preparation is the key to a successful and long-lasting wallpaper installation.
First, look closely at your walls, using a flashlight or a mirror to inspect for cracks, holes, or uneven surfaces. These imperfections can seriously compromise the appearance and durability of your wallpaper, so it’s important to address them before you begin.
Minor issues like small cracks or nail holes can easily be patched using a joint compound. Clean the area, apply the compound, and sand it until it’s flush with the rest of the wall. You may need to replace the drywall entirely if you have larger holes or more extensive damage.
Once your walls are smooth and even, it’s time to clean them thoroughly. Use a mild detergent and warm water to remove dirt, grease, or other contaminants that could interfere with the wallpaper adhesive. Rinse the walls with clean water and let them dry completely.
The final step in wall preparation is priming. Applying the right primer creates a uniform, absorbent surface for the wallpaper to adhere to, which can significantly extend its lifespan. Choose a primer compatible with your wall material, whether drywall, plaster, or brick. Follow the manufacturer’s instructions and allow the primer to dry fully before hanging your wallpaper.
Remember, preparing your walls properly is crucial for a successful and long-lasting wallpaper installation. Trust me, it’s worth the effort to ensure your bedroom looks stunning!
Measuring and Cutting the Wallpaper
Now that your walls are ready, it’s time to tackle the next step: measuring and cutting the wallpaper. This may seem daunting, but you can ensure a seamless, professional-looking installation with a little know-how.
First, let’s determine the correct amount of wallpaper for your bedroom. This is where a little math comes in handy. Measure the length and width of each wall, then multiply those numbers to get the square footage. Add up the square footage of all the walls, and you’ll have the total area you need to cover.
Now, divide that total by the coverage per roll of your chosen wallpaper, typically around 56 square feet per double roll. Remember to round up to the nearest half-roll to account for any waste or errors.
Once you’ve calculated the number of rolls required, it’s time to start measuring and cutting the wallpaper. Lay out the rolls on a flat surface, such as a table or the floor, and use a straight edge and a sharp utility knife to mark and cut the pieces to size. Be sure to leave a 1/4-inch overlap on each end to ensure a seamless fit.
Now, here’s where the real magic happens: pattern matching. If your wallpaper has a repeating design, aligning the patterns between adjacent strips is essential. Use a chalk line or a ruler to mark the pattern repeat, and make sure each strip starts and ends at the same point. This attention to detail will create a polished, professional look that’ll make your friends and family wonder if you hired a pro.
Cutting wallpaper around corners and obstacles can be tricky, but you can maintain that perfect pattern alignment with a few simple techniques. Try the miter cut method for corners, where you cut the paper at a 45-degree angle on both sides. For outlets or light switches, score the paper along the edge with a utility knife to create a clean, tight fit.
By measuring and cutting your wallpaper with precision, you’ll ensure a successful and seamless installation. Trust me, your bedroom will thank you!
Applying the Wallpaper Adhesive
Alright, now that your walls are prepped and your wallpaper measured and cut, it’s time to tackle the adhesive application. This step is crucial for ensuring a secure and long-lasting installation, so pay close attention.
First, you’ll need to choose the right adhesive for your wallpaper. There are a few different options, including pre-mixed pastes, powdered adhesives, and ready-to-use formulas. The type you select will depend on factors like your wall material and the humidity levels in the room.
For example, if your bedroom has high humidity, a powder adhesive that you can mix with water might be your best bet. This will give you more control over the consistency and allow you to adjust it based on the conditions. On the other hand, if your walls are in good shape and the humidity is relatively stable, a pre-mixed paste or a ready-to-use adhesive could be the way to go.

Whatever adhesive you choose, follow the manufacturer’s instructions to the letter. Mixing the adhesive correctly is key – you want it to be the perfect consistency, similar to thick pudding or gravy. If it’s too thin, it won’t provide enough hold; if it’s too thick, it’ll be a nightmare to apply.
Once you’ve mixed and ready the adhesive, it’s time to start coating the wall. Use a notched trowel to spread it on evenly, starting at the bottom and working your way up. Don’t forget to remove any excess with a brush or roller—you want just the right amount of adhesive for a secure bond.
Here’s a pro tip: Pay close attention to the room’s temperature and humidity. These factors can affect the adhesive’s drying time, so you may need to adjust your application technique accordingly. For example, the adhesive may take longer to dry in high humidity, so you’ll want to work in smaller sections to prevent it from getting too tacky.
By selecting the right adhesive and applying it properly, you’re setting yourself up for a wallpaper installation that’ll stand the test of time. Trust me, it’s worth the effort to ensure your bedroom looks stunning.

Hanging the Wallpaper
Alright, this is the moment you’ve been waiting for—it’s time to start hanging that gorgeous wallpaper! This is where all your hard work in the previous steps pays off, so let’s dive in.
First, you’ll want to position that first strip of wallpaper precisely. Use a level and a measuring tape to mark the starting point on the wall, ensuring it’s perfectly straight. Then, apply a thin, even coat of adhesive to the back of the paper and get ready to work your magic.
Carefully align the top edge of the wallpaper with your marked line, then slowly smooth it onto the wall, working out any air bubbles as you go. A wallpaper smoother or a soft cloth will be your best friend here, helping you create a tight, wrinkle-free application.
Now, for the fun part – pattern matching! If your wallpaper has a repeating design, it’s essential to line up the patterns between adjacent strips. Use a chalk line or a ruler to mark the pattern, and repeat and match the seams as you hang each new piece. This attention to detail will give your bedroom that professional, high-end look you’re after.
And don’t worry if you encounter any tricky corners or obstacles, like electrical outlets or light switches. You can navigate those obstacles like a pro with a few simple techniques. Try the miter cut method for corners, where you slice the paper at a 45-degree angle on both sides. For outlets, use a utility knife to score the paper along the edge, making it easy to fold and trim.
Finally, once all the strips are hung, it’s time to trim the excess wallpaper from the edges. Wait until the adhesive is fully dry, then use a sharp utility knife and a straight edge to create a clean, polished finish.
I know it might seem like many steps, but the result is worth it. With a little patience and attention to detail, you’ll have a bedroom that looks like it was designed by a professional – and all for a fraction of the cost!
Finishing Touches
Alright, you’ve made it through the hard part – the wallpaper is up, and your bedroom looks better than ever. But we’re not quite done yet. It’s time to focus on the finishing touches to take your installation to the next level.
First, let’s address any imperfections that may have cropped up during the hanging process. Don’t worry, it happens to the best of us, but there are some easy fixes. For bubbles or wrinkles, use a small, sharp tool like a needle or a seam roller to push out the air gently. And if you’ve got any misaligned seams, you can carefully cut away the excess paper on one side and re-adhere it with a thin layer of wallpaper paste.
Next, it’s time to add that polished, professional touch with some trim or molding. Carefully measure and mark where you want to install the trim, using a level to ensure it’s straight and even. Apply a thin layer of wallpaper paste to the back, then press it firmly into place. Once the paste has dried, you can paint or stain the trim to match your wallpaper.
And don’t forget about ongoing maintenance – your beautiful new wallpaper deserves a little TLC to keep it looking its best. Dust it regularly with a soft-bristled brush or a microfiber cloth, and for more thorough cleaning, use a mild detergent and warm water. Just be sure to avoid any harsh chemicals or abrasive materials that could damage the paper.
By addressing those finishing touches and maintaining your wallpaper, you’re ensuring that your bedroom transformation will last for years to come. Trust me, it’s the little details that make all the difference.
Conclusion
Well, there you have it – your comprehensive guide to hanging wallpaper in your bedroom like a pro. From preparing the walls to applying the adhesive and hanging the paper, you now have all the tools and techniques you need to create a stunning, high-end look that’ll have your friends and family green with envy.
Remember, the key to a successful wallpaper installation is taking your time and paying attention to the details. Don’t be afraid to practice on a small section first, and don’t hesitate to ask for help if you need it. With a little patience and a whole lot of style, you’ll be well on your way to a bedroom worthy of a design magazine.
So, what are you waiting for? Grab that wallpaper, roll up your sleeves, and let’s get to work! Your dream bedroom is just a few steps away.