Hey there, DIY dreamers and kitchen crusaders! Are you ready to turn your culinary corner into a rustic wonderland without breaking the bank? Well, grab your tool belt and put on your thrifting shoes, because we’re about to embark on a whirlwind weekend of kitchen island magic!
In this crafty caper, I’m dishing out five fabulous ways to whip up a rustic kitchen island faster than you can say “Pass the reclaimed wood!” From pallet perfection to rolling cart realness, we’re covering all the bases. So whether you’re a seasoned DIY diva or a first-time fixer-upper, get ready to transform your kitchen from blah to ta-da with these easy-peasy projects. Let’s dive in and get our hands dirty, shall we?
The Repurposed Pallet Island
Ready to turn some trash into treasure? Let’s dive into the world of pallet-tastic kitchen islands that’ll make your wallet and Mother Earth do a happy dance!
Scoring Your Pallet Goldmine
First things first, we gotta score some pallets! Hit up local businesses, construction sites, or even Craigslist for these wooden wonders. Pro tip: Always ask before you snag – we’re upcyclers, not thieves! 😉
Safety first, my crafty compadres! When working with reclaimed wood:
- Rock those gloves and goggles
- Check for rusty nails or splinters
- Give ’em a good once-over for any funky chemical treatments
Pallet Demolition Derby
Time to break it down! Grab your trusty crowbar and get ready for some demo action:
- Wiggle those planks loose
- Pop-out any stubborn nails (save ’em for later!)
- Sand those babies smooth – embrace the imperfections, they’re character gold!
Building Your Rustic Masterpiece
Now for the fun part! Let’s assemble this bad boy:
- Create a sturdy base with 2-3 pallets
- Stack and secure additional pallets for height
- Add some crossbeams for extra stability (nobody wants a wobbly island, folks!)
Countertop Craziness
Choose your fighter:
- Pallet planks: Sand ’em smooth and seal for a rustic vibe
- Butcher block: Classic and functional (hello, chopping station!)
- Concrete: Get your industrial chic on
- Reclaimed wood slab: For that Insta-worthy wow factor
Wheel-y Good Idea
Slap some casters on that island and watch it roll! Perfect for small spaces or impromptu kitchen dance parties. 🕺💃
Finishing Touches
Time to make it pop:
- Stain it: Go au naturel or get wild with color
- Distress it: Channel your inner shabby chic goddess
- Add hardware: Vintage pulls for extra pizzazz
- Install a towel bar: Practical and pretty!

Remember, DIY warriors, this island is all about embracing those quirky imperfections. Let those knots, dings, and stamps shine – they’re what make your creation one-of-a-kind!
Now that we’ve conquered the pallet frontier, let’s mosey on to our next DIY adventure. Get ready to flex those sawdust-covered muscles as we tackle The Stock Lumber Standout – where off-the-shelf meets off-the-charts awesome!
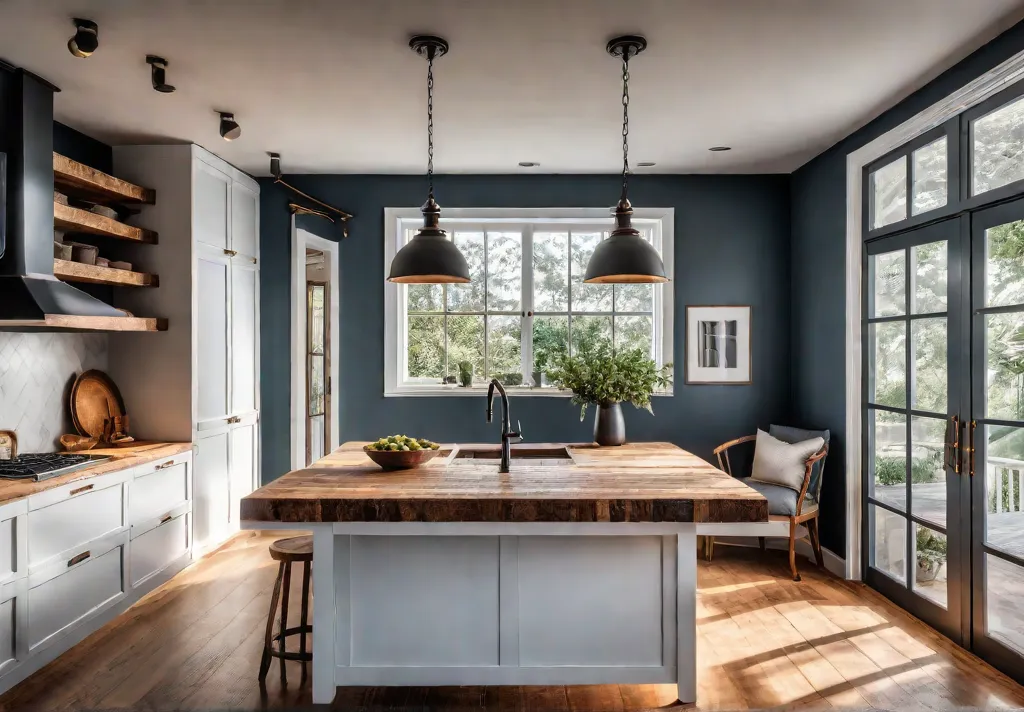
The Stock Lumber Standout
It’s time to get your hands dirty with some good ol’ fashioned lumber love. This rustic kitchen island project is gonna make you feel like a bonafide carpenter without breaking the bank. Let’s dive in and build something epic!

Picking Your Wood Poison
First things first, we gotta choose our weapon of mass construction. Hit up your local home improvement store and feast your eyes on these options:
- Pine: Cheap and cheerful, perfect for budget builds
- Oak: Sturdy AF, but it’ll cost ya
- Maple: The Goldilocks of wood – not too pricey, not too soft
Pro tip: Mix and match for a funky, eclectic vibe. Who says you can’t have a pine frame with an oak top? Rules are made to be broken, people!
Frankensteining Your Framework
Now that you’ve got your lumber loot, it’s time to channel your inner mad scientist and bring this beast to life!
- Measure twice, cut once (or thrice if you’re a klutz like me)
- Get jiggy with a pocket-hole jig for those sneaky-strong joints
- Assemble your frame like a boss – think Legos for grown-ups
Remember, folks: There’s no shame in asking for help. Enlist your bestie or that hot neighbor who’s always mowing shirtless. DIY is more fun with eye candy!

Glow-Up Time: Finishing Touches
You’ve built the bones, now let’s give this bad boy some pizzazz:
- Sand it smoother than a baby’s bottom
- Stain it to perfection (I’m partial to a nice walnut for that rustic charm)
- Seal the deal with a food-safe finish
Speaking of finishes, let’s talk kitchen-friendly options:
- Mineral oil: Au naturel and perfect for butcher block tops
- Polyurethane: Tough as nails, but keep it away from your chopping surfaces
- Tung oil: The hipster choice – all-natural and totally on-trend
Show Me the Money, Honey!
Wondering about those lumber prices? Here’s the lowdown:
- Pine: $2-$5 per board foot (cheap and cheerful, remember?)
- Oak: $6-$8 per board foot (ouch, but worth it for the durability)
- Maple: $4-$6 per board foot (the sweet spot)

Remember, my thrifty friends, you can always mix high and low. Splurge on that gorgeous oak top, then save your pennies with pine for the base. It’s all about that high-low life!
Bonus Round: Storage Shenanigans
Why stop at a basic island when you can add some sneaky storage? Consider these add-ons:
- A cheeky little shelf for your cookbook collection
- Drawers for all those random kitchen gadgets (I’m looking at you, avocado slicer)
- Hooks on the sides for hanging your cutest aprons
The sky’s the limit, my creative comrades! This is your chance to customize the heck out of your new kitchen BFF.
Now that we’ve conquered the world of stock lumber, are you ready to get your hands on something a little more… shall we say, pre-loved? Up next, we’re diving into “The Upcycled Cabinet Chic” – where one DIYer’s trash becomes our treasure! Get ready to flex those thrifting muscles and turn some roadside rescues into kitchen royalty.
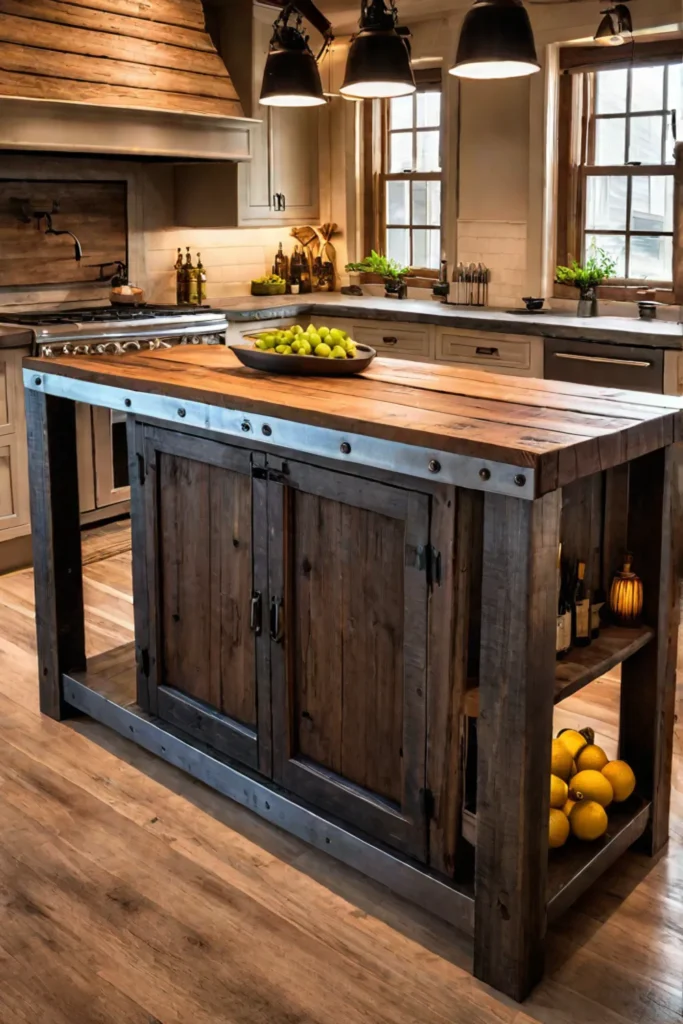
The Upcycled Cabinet Chic
It’s time to turn that sad, neglected cabinet into a kitchen island that’ll make your guests go “Whoa, where’d you score that beauty?” Trust me, this project is easier than convincing your cat it doesn’t need a fifth nap today.

Hunting Down Your Diamond in the Rough
First things first, we gotta find ourselves a cabinet or dresser with potential. Hit up thrift stores, flea markets, or even your grandma’s attic. Pro tip: Check Facebook Marketplace or Craigslist for some serious steals. Just remember, we’re looking for solid bones here, not a termite condo.
Safety first, though! When you’re working with vintage pieces, watch out for lead paint, rusty nails, or any funky smells. If it looks like it might be harboring more than just dust bunnies, maybe leave that one for the next treasure hunter.
From Drab to Fab: Prepping Your Piece
Once you’ve snagged your soon-to-be stunner, it’s time for a little TLC:
- Give it a good scrub-down (bye-bye, decades of grime!)
- Remove any hardware you’re not vibing with
- Sand that baby smooth (or leave some character if you’re going for that weathered look)
- Fill any holes or cracks with wood filler
- Prime it up if you’re planning a paint job

Reinforcing Your Recycled Rockstar
Now, let’s make sure this bad boy can handle all those pots and pans you’re gonna throw at it:
- Add some cross braces underneath for extra support
- Replace any wobbly legs with sturdy new ones
- If you’re feeling extra, add casters for a mobile island (hello, kitchen dance party!)
Topping It Off Countertop Creativity
Here’s where you can let your freak flag fly, folks! Some ideas to get your creative juices flowing:
- Salvaged wood planks for that rustic charm
- Poured concrete for an industrial edge
- Butcher block for a classic look
- Marble remnants if you’re feeling fancy
- Penny tiles for a quirky, colorful vibe

Whatever you choose, make sure it’s sealed properly. We don’t want any wine stains ruining our masterpiece!
The Grand Finale: Styling Your Island
Now for the fun part – making it yours! Paint it a bold color, distress it for that vintage vibe, or leave it au naturel if that’s your jam. Add some funky hardware, hang a pot rack underneath, or install a towel bar on the side. The sky’s the limit, my crafty comrades!
Remember, upcycling isn’t just good for your wallet – it’s a win for Mother Earth too. You’re keeping perfectly good furniture out of landfills and giving it a second life. How’s that for eco-chic?
So, there you have it – your very own one-of-a-kind kitchen island that’ll have your friends thinking you dropped major dough at some fancy boutique. Little do they know, you’re just a savvy DIYer with impeccable taste and mad skills.

Now, if you’re digging this whole “less is more” vibe (who am I kidding, more is more!), stick around for our next section on The Open Shelving Simplicity. We’re about to strip things down and show off those dishes like the culinary rockstar you are!
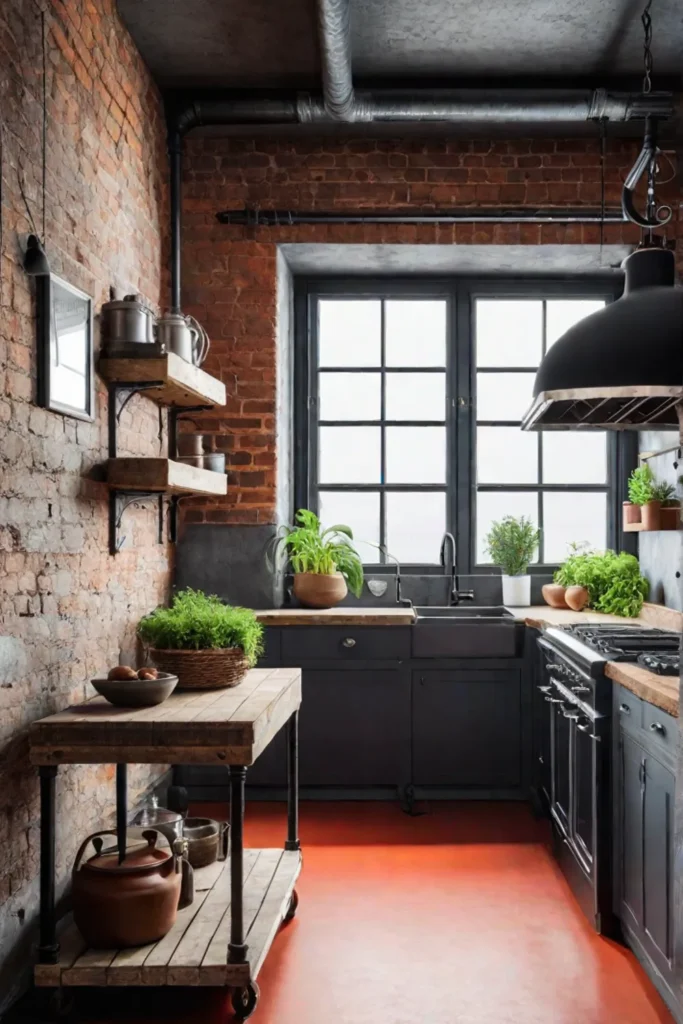
The Open Shelving Simplicity
Ready to kick your kitchen island game up a notch? Let’s dive into the world of open shelving – it’s like giving your kitchen a breath of fresh air, minus the weird smells from that forgotten Tupperware in the back of your fridge. Trust me, this project is so easy, you’ll be done before you can say “Where’s my power drill?”
Shelf Life: Designing Your Open Oasis
First things first, we gotta plan this bad boy out. Grab a tape measure and start plotting your shelf spacing like a master strategist. Pro tip: Think about what you’ll be showcasing. Cookbooks? Fancy plates? That ceramic rooster you impulse-bought at 2 AM? Whatever floats your boat, make sure you’ve got enough vertical real estate between shelves.

Support Group: Building Your Island’s Backbone
Now, let’s talk structure. You’ve got two main options here:
- Wood: Perfect for that rustic, “I live in a Pinterest-worthy farmhouse” vibe.
- Metal: For when you want to channel your inner industrial chic goddess.
I’m all about mixing it up. Why not use some reclaimed barn wood with metal pipe supports? It’s like the mullet of kitchen islands – business on top, party on the bottom!
Shelf-Care: Installing Your New Babies
Listen up, because this part’s crucial. We don’t want any shelf-astrophes here! Make sure you’re anchoring those shelves to studs or using heavy-duty wall anchors. Nobody wants to explain to their insurance company why there’s a shelf-shaped hole in their floor.
Styling 101: Making Your Shelves Insta-Worthy
Now for the fun part – styling those shelves! Here are some quick tips to make your open shelving pop:
- Group items in odd numbers (it’s weirdly pleasing to the eye)
- Mix heights and textures
- Add some greenery (fake plants count, no judgment here)
- Don’t be afraid to get a little weird – that’s where the magic happens!

Remember, these shelves are like your kitchen’s runway. Let those dishes and gadgets strut their stuff!
Bonus Round: Sneaky Storage Hacks
Want to level up your island game even more? Slap some hooks on the sides for hanging utensils or add a few baskets for hiding away the not-so-pretty stuff. It’s like giving your island a secret identity – Clark Kent on the outside, Superman on the inside.
So there you have it, folks! Your ticket to open shelving nirvana. This project is perfect for DIY newbies and seasoned pros alike. Plus, it’s a great excuse to finally organize that junk drawer. You know the one.
Now, if you thought this was fun, just wait until you see what’s coming up next. We’re about to roll into something that’ll get your creative wheels turning. Get ready for “The Rolling Cart Solution” – it’s like your kitchen island decided to strap on a pair of roller skates and live its best life!

The Rolling Cart Solution
Let’s roll out the red carpet for our next kitchen island superstar – the rolling cart! This little dynamo is about to rock your culinary world faster than you can say “mobile munchie station.”
Snagging Your Perfect Cart Companion
First things first, we gotta hunt down the perfect wheeled wonder for your kitchen kingdom. Size matters, folks! Measure your space and don’t forget to factor in some wiggle room for when you’re doing the kitchen cha-cha. Look for carts with:
- Sturdy wheels (bonus points for locking casters)
- Shelves or drawers for extra storage mojo
- A size that fits your kitchen like a glove
Pro tip: Thrift stores and flea markets are goldmines for vintage carts begging for a makeover. I scored my current kitchen sidekick from a curbstreeter special!

Topping It Off with Butcher Block Brilliance
Now, let’s talk toppers. A butcher block countertop is like the cherry on your DIY sundae – it’s practical, pretty, and oh-so-satisfying. Here’s the lowdown on your options:
- Maple: Hard as nails and light in color
- Walnut: Dark and dramatic, perfect for the kitchen goth
- Bamboo: Eco-friendly and tough as old boots
Installation is a breeze – just measure, cut (if needed), and secure that bad boy with some heavy-duty adhesive. Don’t forget to seal it up to keep it looking fresh!
Pimp My Cart: Customization Station
This is where the magic happens, my crafty compadres. Let’s turn that ho-hum cart into a showstopper:
- Paint it bold: Go wild with color! I’m talking electric blue, emerald green, or even a funky ombre effect.
- Hardware upgrade: Swap out those boring knobs for some vintage bling or sleek modern pulls.
- Add some flair: Stick on some peel-and-play wallpaper or decoupage that sucker with vintage cookbook pages.
And for the grand finale, trick it out with some bonus features:
- Towel bar on the side (because spills happen)
- S-hooks for hanging utensils (embrace your inner Julia Child)
- Wire baskets underneath for produce storage (hello, rolling farmers market!)

The Verdict: Wheely Good or Just Meh?
Let’s break it down, DIY squad. The rolling cart island is:
Pros:
- More flexible than your yoga instructor
- Perfect for tiny kitchens or commitment phobes
- Easy-peasy to customize
Cons:
- Not as much storage as a built-in island
- Can feel a bit less sturdy than fixed options
But here’s the tea: for a weekend project that packs a punch, the rolling cart is hard to beat. It’s like the Swiss Army knife of kitchen islands – compact, versatile, and always ready for action.
As we roll on to our grand finale, remember that the perfect kitchen island is like the perfect outfit – it should fit your style, your space, and your lifestyle. So whether you’re team rolling cart or eyeing up one of our other DIY delights, the most important thing is to have fun and make it yours. Now, let’s wrap this party up and see what other pearls of wisdom we can drop in our conclusion!
Conclusion
Well, my DIY daredevils, we’ve rolled through five fantastic ways to rustic-ify your kitchen with some seriously swoon-worthy islands. From pallet paradises to rolling cart revelations, we’ve covered more ground than a runaway meatball on a slanted countertop. But remember, these projects are just the beginning of your kitchen transformation journey!

The beauty of DIY is that it’s all about making it uniquely you. So go ahead, mix and match these ideas, throw in some of your flair, and create an island that’s as one-of-a-kind as your secret sauce recipe. And hey, if you end up covered in sawdust and hot glue, wearing mismatched socks, and sporting a questionable hairdo by the end of it all – congratulations! You’ve officially joined the ranks of us DIY diehards. Now go forth and conquer that kitchen, you crafty little genius,!