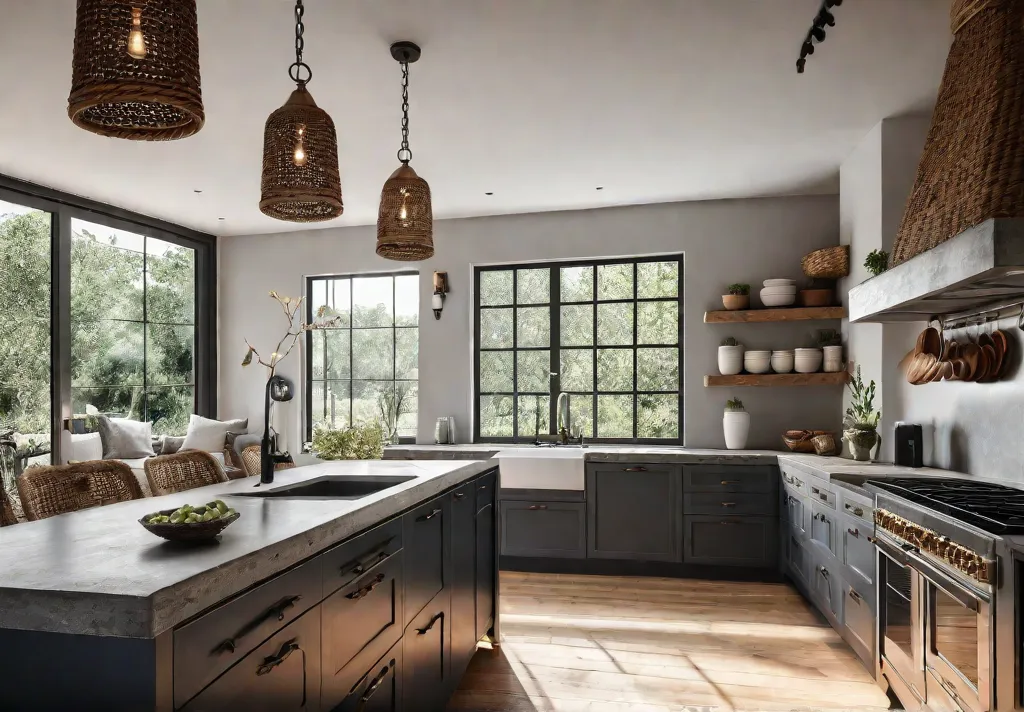
Hey there, design rebels and kitchen revolutionaries! Are you ready to ditch the same old, same old, and give your culinary kingdom a rustic makeover that’ll knock your socks off? Well, buckle up buttercup, because we’re about to embark on a wild ride through seven kitchen island ideas that’ll make reclaimed wood look like yesterday’s news!
From concrete countertops that scream “urban chic” to stone slabs that whisper “timeless elegance,” we’re gonna explore some seriously cool alternatives that’ll have your friends green with envy. So grab your hard hat and your sense of adventure, because things are about to get deliciously DIY up in here. Let’s dive in and turn that kitchen island from blah to ta-da!
Embrace the Industrial Chic: Concrete Kitchen Islands
Ready to take your rustic kitchen game to the next level? Let’s ditch the reclaimed wood for a hot minute and dive into the world of concrete kitchen islands. Trust me, it’s not as crazy as it sounds!
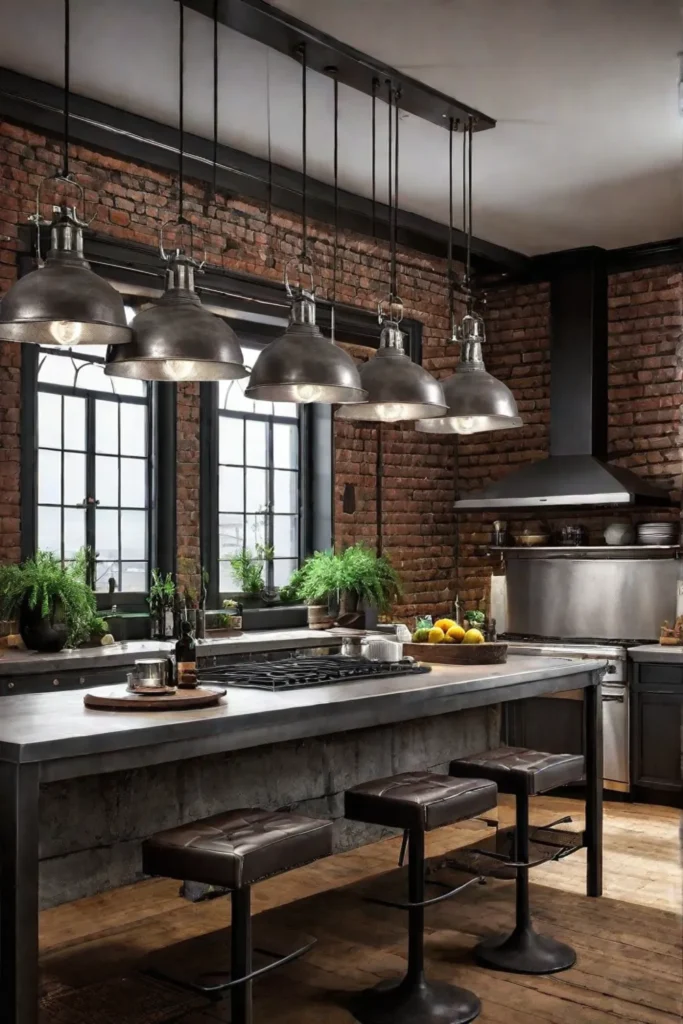
Concrete Finishes: From Sleek to Street
Alright, my fellow design junkies, let’s talk finishes. Concrete isn’t just that boring gray stuff you see on sidewalks. Oh no, we’re about to get wild with it!
- Polished: Smooth as a baby’s bottom and shiny enough to see your reflection. Perfect for your fancy pants out there.
- Rough-hewn: For when you want that “I just jackhammered this out of the street” look. Urban chic, anyone?
- Colored: Mix in some pigments and BAM! You’ve got a concrete island that’s as colorful as your personality.
- Textured: Add some aggregate or use a stamp for a finish that’s more interesting than your ex’s Instagram feed.
Pro tip: Want to blow some minds? Try a waterfall edge on that bad boy. It’s like a concrete waterfall, minus the wet feet.
Concrete + What Now?
Listen up, mixologists of the design world! Concrete plays well with others, so don’t be afraid to introduce it to some new friends:
- Wood: Pair that sleek concrete with some rough-and-tumble reclaimed wood for a yin-yang vibe that’ll make your kitchen the talk of the town.
- Metal: Industrial chic, baby! Think concrete and stainless steel having a design love child.
- Glass: For when you want to feel like you’re cooking in a modern art museum.
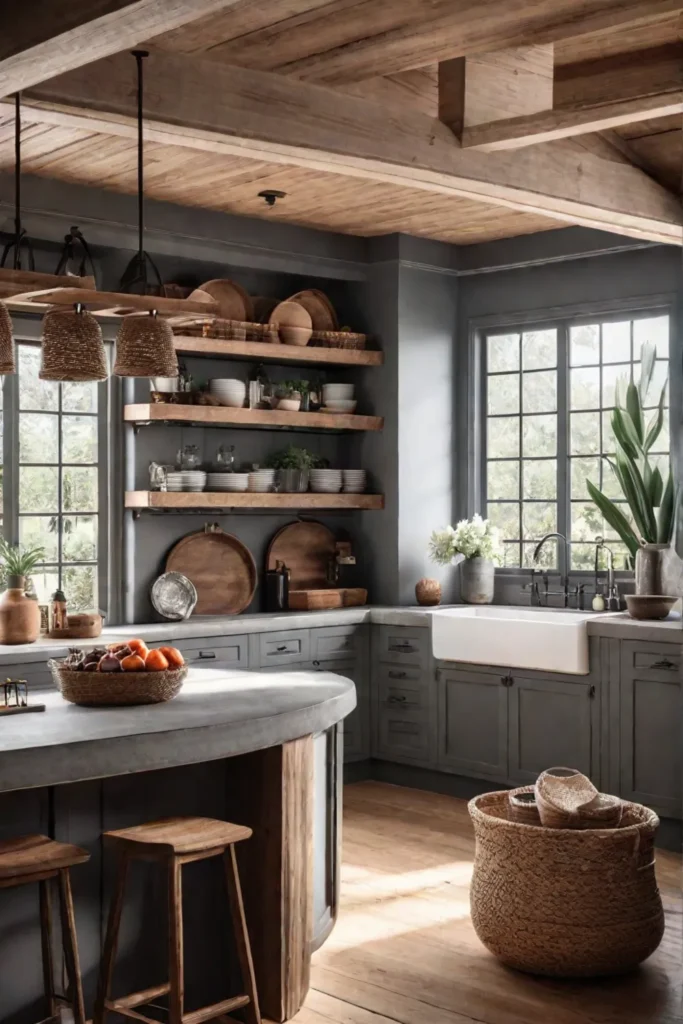
But Is It Practical?
I hear you, practical Pollys out there. You’re thinking, “Sure, it looks cool, but can I use it?” Well, buckle up, buttercup, because concrete is about to blow your mind:
- It’s tougher than your grandma’s fruitcake. Seriously, this stuff can take a beating.
- Stain-resistant when sealed properly. Red wine? Pfft, bring it on.
- Easy to clean. A little soap and water, and you’re golden.
- Surprisingly warm to the touch. No more yelping when you lean on it first thing in the morning!
DIY or Die Trying
Now, I know you’re itching to get your hands dirty. Here’s a quick and dirty guide to getting started:
- Choose your mix: Go for a high-strength concrete mix with small aggregate.
- Build a mold: Think of it as a giant sandbox for adults.
- Add reinforcement: Rebar or wire mesh will keep your island from cracking under pressure.
- Pour and cure: Patience, grasshopper. Good things come to those who wait.
- Seal the deal: Don’t skip this step unless you want a very porous, very stained island.
Remember, if all else fails, there’s no shame in calling in the pros. Sometimes, it’s better to admit defeat than to end up with a kitchen that looks like a failed science experiment.
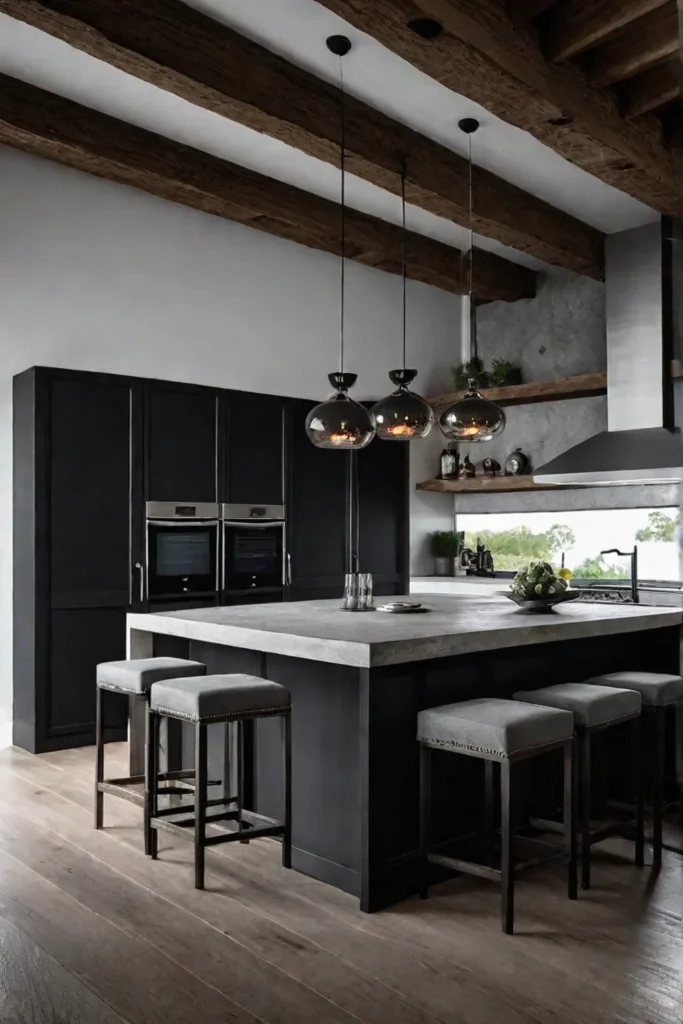
So there you have it, folks! Concrete kitchen islands: the perfect blend of rustic charm and “I’m cooler than you” sophistication. It’s like the James Dean of kitchen design – a little bit rebel, a whole lot of style.
But hey, if concrete’s not your jam, don’t worry. Up next, we’re diving into the world of stone kitchen islands. Because nothing says “I’m fancy” quite like cooking on a big ol’ rock. Stay tuned for “Timeless Elegance: Stone Kitchen Islands for a Rustic Touch” – it’s gonna rock your world! (See what I did there? Oh, come on, you know you love it.)
Timeless Elegance: Stone Kitchen Islands for a Rustic Touch
Let’s ditch the reclaimed wood for a hot minute and dive into the world of stone islands that’ll make your kitchen scream “timeless chic” while whispering “I’m a total badass at hosting dinner parties.”

Stone Cold Stunners: Popular Rock Stars for Your Kitchen
Listen up, because I’m about to drop some knowledge on the hottest stones in the biz:
- Granite: This bad boy is harder than your ex’s heart and just as unbreakable. It’s like the superhero of countertops – impervious to heat, scratches, and your clumsy friend’s red wine spills.
- Marble: The diva of the stone world. It’s gorgeous, high-maintenance, and develops a unique patina over time. Like that vintage leather jacket you scored at the flea market, it only gets better with age.
- Soapstone: The strong, silent type. It’s naturally non-porous (bye-bye, bacteria!) and stain-resistant. Plus, it’s got that whole moody, dark academia vibe going on.
Caring for Your Stone Baby: Keep That Rock Rollin’
Now, don’t go thinking you can just plop a stone island in your kitchen and forget about it. These beauties need some TLC to keep them looking fly:
- Seal the deal: Most stones need sealing to prevent stains. Think of it as sunscreen for your countertop – reapply regularly to avoid nasty surprises.
- Clean and mean: Use pH-neutral cleaners to avoid etching. No vinegar dance parties on this surface, folks!
- Chop chop: Always use a cutting board. Your knives will thank you, and your stone won’t end up looking like a battle scene from “300”.

Stone Island Inspo: Get Your Pinterest Boards Ready
- Soapstone Stunner: Pair a moody soapstone island with a farmhouse sink for major rustic vibes. Add some copper accents, and boom – instant kitchen goals.
- Honed Granite Haven: Go for honed granite in a warm tone for a more understated look. It’s like the “no-makeup” makeup of kitchen islands – effortlessly chic.
- Marble Meets Wood: Combine a marble island top with a wooden base for the ultimate high-low mix. It’s like pairing your grandma’s pearls with a vintage band tee – unexpected and awesome.
The Stone Cold Truth: Pros and Cons
Let’s break it down, folks:
Granite
- Pros: Tough as nails, heat-resistant, low maintenance
- Cons: Can be pricey, limited color options
Marble
- Pros: Stunning looks, cool to the touch (perfect for pastry chefs!)
- Cons: Easily etched and stained, high maintenance
Soapstone
- Pros: Non-porous, heat-resistant, develops a cool patina
- Cons: Limited color range, can scratch (but you can buff ’em out!)

Stone Island Hacks: Level Up Your Kitchen Game
- Mix and match: Combine a stone island top with a butcher block prep area for the best of both worlds.
- Edge it up: Choose a funky edge profile to add some personality to your stone. Waterfall Edge, anyone?
- Light it right: Install some under-counter lighting to make that stone sparkle like the gem it is.
Remember, my fellow design desperados, a stone island isn’t just a countertop – it’s a statement piece that screams “I’ve got my life together” (even if your junk drawer tells a different story). So go forth and rock that stone!
Now, if you’re digging the rustic vibe but still not sold on stone, hold onto your vintage aprons because we’re about to dive into a world where tiles reign supreme. Get ready to channel your inner mosaic artist as we explore “Rustic Warmth with a Twist: Tile Kitchen Islands” in our next section. Trust me, it’s gonna be groovy, baby!
Rustic Warmth with a Twist: Tile Kitchen Islands
Alright, let’s dive into the world of tile kitchen islands! Trust me, this ain’t your grandma’s boring backsplash. We’re talking about slapping some serious personality onto your kitchen centerpiece. Ready to get groovy with grout? Let’s go!

Tile: The Chameleon of Kitchen Materials
Yo, did you know tile is like the ultimate shape-shifter of kitchen materials? It’s true! This bad boy can mimic everything from reclaimed wood to fancy-pants marble, all while being way easier on your wallet. Plus, it’s tough as nails and a breeze to clean. Win-win, am I right?
Tile Styles That’ll Make You Swoon
- Subway Tile: Classic, but make it sassy
- Mosaic Madness: For when you’re feeling extra
- Pattern Party: Cement tiles that’ll blow your mind
Pro tip: Try laying subway tiles in a herringbone pattern. It’s like giving your island a fancy hairdo!
Layouts That’ll Make Your Eyeballs Happy
Listen up, because this is where the magic happens. The way you lay your tiles can transform your island from meh to marvelous. Here are some ideas to get your creative juices flowing:
- Go vertical with long, skinny tiles for a modern vibe
- Mix and match different sizes for a patchwork effect
- Create a focal point with a mosaic “rug” on top of the island

Tile Materials: The Good, The Bad, and The Ugly
Okay, real talk time. When it comes to high-traffic kitchen areas, you want tiles that can take a beating. Here’s the lowdown:
- Porcelain: This tough cookie can handle spills, stains, and your kids’ impromptu drum solos
- Ceramic: Budget-friendly and comes in more colors than a rainbow explosion
- Cement: Handcrafted look that’ll make your hipster friends jealous
Grout Glory: Don’t Mess This Up!
Listen, folks. Grout might seem boring, but it can make or break your tile game. Here’s how to nail it:
- Choose a grout color that complements your tiles (or go wild with a contrasting hue!)
- Seal that grout like your life depends on it (trust me, it does)
- For easy cleaning, go with a slightly darker grout color (because who has time for scrubbing?)
The Takeaway
Tile islands are like the Swiss Army knife of kitchen design – versatile, practical, and oh-so-stylish. They let you unleash your inner artist while still keeping things rustic and warm. So go ahead, mix those patterns, play with layouts, and create an island that’s as unique as you are!
Ready to take your rustic kitchen to the next level? Hold onto your hard hats, because we’re about to dive into the world of Unexpected Industrial Flair: Metal Kitchen Islands. Get ready for some serious heavy-metal action!
Unexpected Industrial Flair: Metal Kitchen Islands
We’re about to get our hands dirty with some seriously cool metal kitchen island action. Forget those basic wood slabs – it’s time to bring the industrial chic vibes to your culinary command center!

Metal Mania: Stainless Steel, Copper, and Zinc, Oh My!
Let’s break down the metal options that’ll make your kitchen pop like a fresh can of spray paint:
- Stainless Steel: The OG of metal surfaces. It’s sleek, it’s chic, and it laughs in the face of rust. Perfect for those of us who can’t resist a good spill (guilty as charged!).
- Copper: This bad boy develops a gorgeous patina over time. It’s like watching your favorite vintage find age gracefully – pure magic!
- Zinc: For all you weathered-look lovers out there, zinc is your new BFF. It’s got that lived-in vibe that screams “I’ve seen some things, man.”
Mix, Match, and Make It Yours
Now, here’s where the fun begins. Who says you have to stick to just one material? Not this gal! Try these combos on for size:
- Stainless steel top + reclaimed wood base = modern farmhouse realness
- Copper countertop + industrial pipe legs = steampunk paradise
- Zinc surface + concrete base = urban loft dreams
Pro tip: Throw in some metal accents like floating shelves or funky pendant lights to tie the whole look together. It’s all about those little details, folks!

Maintenance Madness: Keeping Your Metal Masterpiece Shiny
Alright, let’s talk upkeep. Because let’s face it, a neglected metal island is about as sad as a thrift store reject.
- Stainless steel: Wipe it down with warm, soapy water and buff it with a microfiber cloth. Easy peasy!
- Copper: Embrace the patina or keep it shiny with a mixture of lemon juice and baking soda.
- Zinc: A little mild soap and water will do the trick. Don’t go crazy with harsh chemicals!
To prevent scratches and dents (because we all know accidents happen), invest in some cute trivets and cutting boards. Your future self will thank you!
The Takeaway: Metal Magic
Listen, darlings, adding a metal kitchen island is like giving your kitchen a shot of espresso – it wakes everything up! It’s unexpected, it’s durable, and it’s guaranteed to make your space stand out from the cookie-cutter crowd.
So go ahead, embrace your inner metalhead, and create a kitchen that’s as unique as you are. And remember, if anyone gives you a side-eye for your unconventional choice, just tell them you’re too metal for their basic tastes!

Now that we’ve conquered the world of metal islands, let’s take this rustic revolution beyond the kitchen centerpiece. Get ready to sprinkle some farmhouse fairy dust all over your cooking space, because we’re about to dive into “Beyond the Island: Incorporating Rustic Elements”. Spoiler alert: It’s gonna be epic!
Beyond the Island: Incorporating Rustic Elements
Let’s take this rustic kitchen vibe and crank it up to eleven! We’ve already zhuzhed up that island, but why stop there? It’s time to spread the rustic love all over your culinary kingdom. Grab your metaphorical paintbrush (or maybe a real one, who knows?), and let’s get crackin’ on making your entire kitchen scream “farmhouse chic” without actually moving to a farm. Trust me, your chickens will thank you.
Rustic Lighting: Illuminating Ideas That’ll Make You Say “Watt?!”
Listen up, light lovers! Nothing says “rustic” quite like some strategically placed illumination. Here are some electrifying ideas to brighten your day (and night):
- Wrought iron chandeliers: Go full-on medieval castle vibes without the dragons.
- Edison bulb pendants: Because who doesn’t want their kitchen to look like a hipster coffee shop?
- Mason jar sconces: For when you’re feeling extra Pinterest-y.
- Rope-wrapped fixtures: Perfect for channeling your inner sailor (ahoy, matey!).
Pro tip: Hang those pendants over your island like they’re going out of style. Not only will they look ah-mazing, but they’ll also help you see what you’re chopping. Safety first, fashion second!

Hardware and Accessories: The Jewelry of Your Kitchen
Time to accessorize, my friends! Think of your kitchen as a blank canvas, and these rustic touches as the final brushstrokes of your masterpiece:
- Bin pulls and cup handles: Because your drawers deserve some bling too.
- Wooden cutting boards: Prop these bad boys up against your backsplash for instant rustic cred.
- Woven baskets: Perfect for storing your secret stash of chocolate… I mean, onions.
- Vintage signs: Nothing says “rustic” quite like a sign that says “EAT” in case you forget why you’re in the kitchen.
Remember, the key to rustic hardware is embracing imperfections. If it looks like it could’ve been yanked off a 100-year-old barn door, you’re on the right track!
Open Shelving: Because Doors Are So Last Season
Want to amp up the rustic factor? Ditch those upper cabinets and embrace open shelving like it’s your new religion. Here’s how to style those shelves like a pro:
- Stack mismatched plates and bowls for that “I didn’t try hard” look.
- Display vintage kitchen tools. Bonus points if you have no idea what they’re used for.
- Add some greenery. Succulents are great because they’re immortal.
- Mix in some rustic elements like mason jars filled with dry goods. It’s practical and pretty!

Textiles: Because Your Kitchen Deserves a Hug
Don’t forget about the soft touches! Textiles can take your rustic kitchen from “meh” to “magnificent” faster than you can say “gingham”:
- Burlap curtains: Because sometimes you want your windows to look like potato sacks.
- Linen dish towels: Bonus points if they have cheesy kitchen puns on them.
- A vintage rug: Nothing ties a room together quite like a rug that looks like it’s seen some things.
Remember, the more wrinkled and imperfect, the better. We’re going for a “charming farmhouse,” not a “sterile operating room.”
By incorporating these rustic elements throughout your kitchen, you’ll create a space that’s more cohesive than a boy band and more inviting than free pizza. It’s all about layering textures, mixing materials, and injecting your personality into every nook and cranny.
Now that we’ve rustic-ified every inch of your kitchen, it’s time to step back and admire your handiwork. But wait! Before you break out the celebratory kombucha, we’ve got one last thing to cover. In our next section, we’ll wrap this whole shebang up with a bow and send you off to create the rustic kitchen of your dreams. Onward to the conclusion, my DIY warriors!

Final Thoughts
Alright, my fearless kitchen warriors, we’ve journeyed through the land of rustic kitchen islands and come out the other side with some seriously epic ideas. From concrete to stone, tile to metal, and everything in between, we’ve armed you with enough inspiration to make your kitchen the talk of the town (or at least your book club).
Remember, the key to nailing that rustic vibe is all about embracing imperfections and letting your personality shine through. So go ahead, mix those materials, clash those patterns, and create a kitchen island that’s as unique as your signature dance moves. And if anyone gives you a side-eye for your unconventional choices, just tell ’em you’re too busy being fabulous to care. Now go forth and conquer that kitchen renovation, you domestic goddess, you!
